
1. Adding PI and PLI expiry dates
Go to Contractors > View contractors
Locate the contractor in question
Click on the edit pencil icon
Open the Insurance tab
Enter the PI and PLI expiry dates, and any other information, as required
Click Submit
2. Tracking expiry
Go to Contractors > View contractors
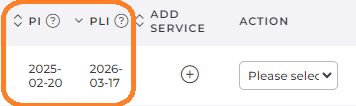
If expiry dates have been entered within a contractor's record, they will be listed within the PI and PLI columns (highlighted below)

Click on either column header to sort the column chronologically and bring to the top contractors with PI/PLI dates that have already expired followed by those due to expire in the near future
The View contractors page can be exported should a user prefer to track insurance expiries using a spreadsheet. Click on the Export button to export this data in Excel format.
3. Requesting an updated insurance certificate
Go to Contractors > View contractors
Once you have located the relevant contractor record, open the Action dropdown menu
Choose Email insurance documents request
4. Uploading a new insurance certificate
Go to Contractors > View contractors
Once you have located the relevant contractor record, open the Action dropdown menu
Select Upload/View documents
Ensure you are on the Uploaded documents tab
In the Upload column, select the upload icon
Drag and drop the document into the pop-up window, or click on Add files and locate the document within your computer files
Click on Start upload
Once uploaded, close the pop-up window and refresh the page
The number within the Upload documents column will have updated to reflect the document(s) just uploaded
Note: You can also view any generated remittance advises within the Generated documents tab on this page.